You plan a trip of a lifetime, save up and look forward to your trip for months. And once you actually get there, you want to be able to capture the most stunning photos of your trip to document your memories possible. Let us tell you a secret: it’s not really all that hard to capture those beautiful travel photos that are practically magazine quality. It’s true that there’s a lot of artistic talent that goes in to creating the most beautiful photos that grace the covers of National Geographic, but a lot of aspects of photography like learning how to actually use your camera and understanding lighting or framing rules can help you drastically improve your photography. And as with a lot of things in life, practice makes perfect. If you really want to come home with your best travel photos possible, think about investing in an online photography course a few months before your trip. We love the Photo Muse Masterclass by Kristin Addis and think its one of the most complete and best online photography courses for travel out there.
How an Online Photography Course Can Improve Your Vacation Photos
We spend hours planning for many of our shots, waiting for the right light, and shooting hundreds of shots to eventually select just a few that make it on our blog and social media. It’s a necessity for us since we’re almost always working with a client when we’re traveling. We need to come home with high quality photos that both help us illustrate the story we want to tell and show off the best of that destination or activity in order to inspire others to repeat our trips.
You don’t need to be a professional travel blogger to get value out of taking an online photography course, though. Just understanding how to use your camera and some photography basics like aperture, shutter speed and ISO can bring your photos to life and help whoever you’re showing them off to feel like they were right there with you.
You don’t need super expensive, fancy equipment – any camera can take good photos when YOU know how to take good photos. There’s definitely this misconception that you need a big, expensive camera though. We can’t tell you how many people we see go out and buy a camera that offers a lot more functionality than a point and shoot, but then never actually learn how to use it. An online photography course like the Photo Muse Masterclass takes you through the photography basics and what the various functions of your camera are in a much more engaging way than reading the manual that came with your camera.
While we can spend hours shooting a single location, you don’t need to invest that amount of time in your travel photos if you don’t want to. Understanding your camera and photography basics will also help you capture your vacation photos faster. Instead of wasting time trying to figure out camera functions on the spot or getting frustrated that the light or environmental settings don’t seem to be working, training your eye with practice also makes you a more efficient photographer.
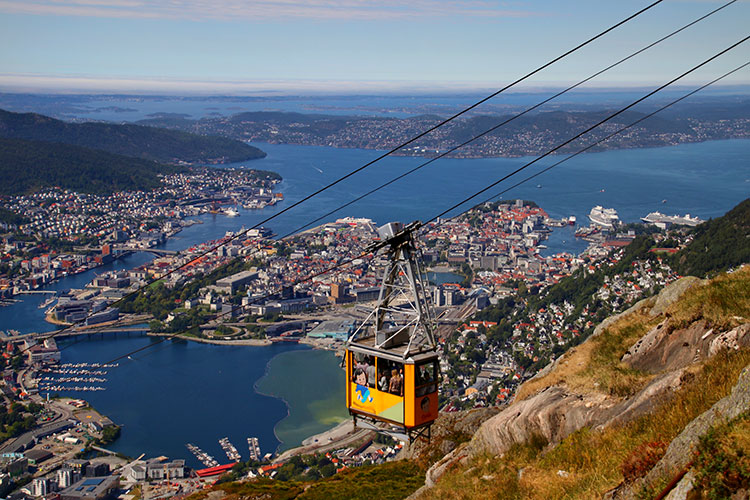
Waiting for the cable car to be in the shot made the incredible view over Bergen even more interesting
Photo Muse Masterclass
We met Kristin, who is the solo adventure traveler behind the popular solo travel blog Be My Travel Muse, on a travel blogger trip to Greece in 2014. Kristin’s passion for travel and photography is infectious and I particularly admire her for helping other women to feel good in their own skin.
I absolutely hate being photographed, and have actively avoided being in most of my photos unless absolutely necessary. Probably like many of us, I’m super critical of myself and find every flaw that no one else ever notices. I’m afraid of being judged for my weight and body, and I hate the way I look. But it is true that the human interest element helps people connect with your photography more. I’ll also admit that I do come home from the some of the most beautiful places on the planet and always regret that I’m not in more of our photos. Even if those photos never saw the light of day here on our blog or Instagram, we’d at least have photos of ourselves for our own memories.
Kristin is in the majority of her photos. She’s a woman that appears cool, confident and comfortable in front of the camera. So when she asked us to review her new online photography course, I was honestly excited to dive in to the Photo Muse Masterclass. I’ve never been comfortable in front of the camera and posing to look natural is something I struggle with. Kristin covers an entire module in the Photo Muse Masterclass on just posing and styling your photo. I knew I’d learn a lot from her particularly in this area.
What’s Included in the Photo Muse Masterclass
Kristin didn’t start out as a professional photographer that had studied and taken classes. She learned through practice and experience in the field. She’s taken that knowledge and packaged it up in to her Be My Travel Muse Photo Muse Masterclass. Here’s what you get with her course:
- Lifetime access to the Photo Muse Masterclass online photography course
- 21 lessons divided into five modules
- Workbooks throughout the course to help you practice the skills learned in the modules
- Access to the Photo Muse Masterclass members-only Facebook group, where you can interact with Kristin and others taking the class
- A complete set of Kristin’s Lightroom presets to help you get started with easily editing your photos
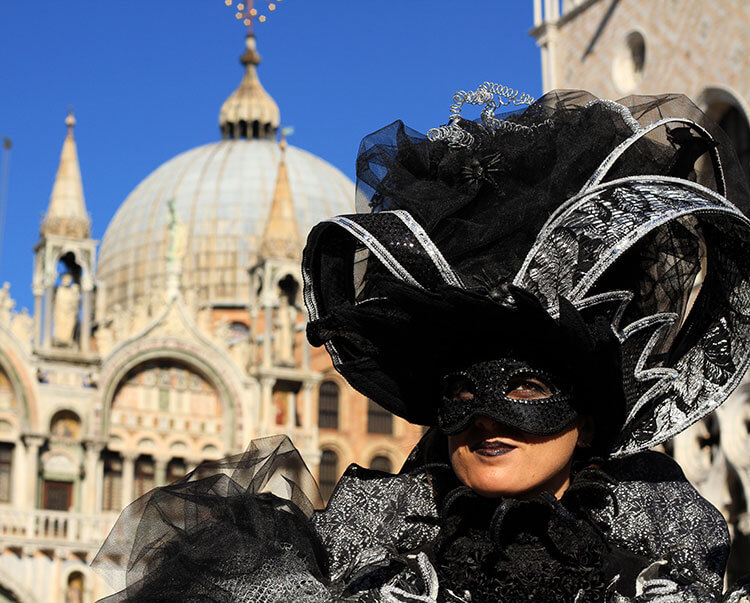
Angles can make a break a photo. You wouldn’t know that Piazza San Marco was swarmed with thousands of people because of the angle we shot this photo during Venice Carnival
Photo Muse Masterclass Modules
The course has been divided up in to five modules: equipment and photography basics, photography shooting techniques, posing and styling your photos, editing your photos, and marketing your blog and Instagram. Kristin has shot a video for every one of the 21 lessons in the course and the videos vary in length from 3 minutes to up to 30 minutes. The longest video is the editing lesson, but Kristin is so engaging that the 33 minutes flies by. On average the videos for each lesson are around 10 minutes in length.
Each lesson also is accompanied by all of Kristen’s main points in text below the video. She includes links to her favorite equipment, Instagram accounts and any websites she references in her video so that you can easily click over.
Many of the lessons also include a worksheet or workbook. The worksheets and workbooks challenge you to take photos in different light settings or shoot certain styles of photos. And if you’re interested in developing your photography skills to become a professional blogger or influencer, the worksheets also help you to think about what your passion is in order to develop your niche.
Module 1: Mastering Your Equipment
The first module includes four lessons broken up in to learning photography basics like aperture, shutter speed and ISO; creative styles your camera can help you achieve by understanding white balance; equipment; and how to use a remote in order to be your own photographer. Even though Kristin uses a Sony a6000 herself, she’s done her research and is knowledgeable about some of the other most popular cameras on the market that offer similar functionality to her own Sony a6000.
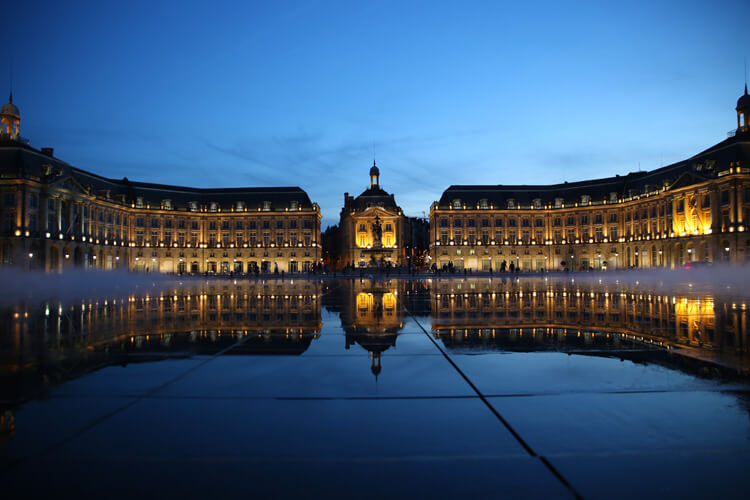
Blue hour is one of the most beautiful times of day to photograph the Miroir d’Eau and Place de la Bourse
Module 2: Shooting Techniques
The second module delves in to the various times of day when lighting is best for outdoor photography, how to take long exposure photos, and astrophotograpy.
Taking photos in the middle of the day gives the harshest light and it isn’t the best for photography. Sometimes you just can’t avoid taking photos in the middle of the day if you’re on a tour or out hiking. If you can plan to take photos at time of the day that we photographers love like golden hour (the hour before and just after sunrise) and blue hour (the hour after sunset), then your photos can really be next level.
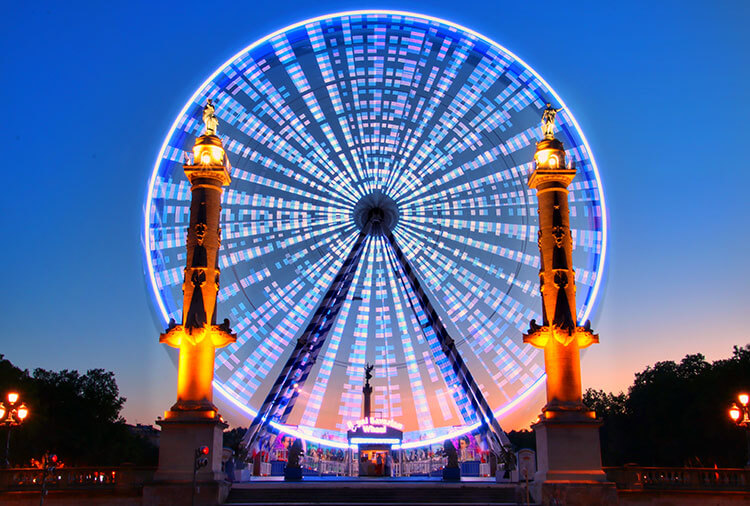
Blue hour is one of my own personal favorite times of the day to shoot photos, especially for cityscapes. I shot the above photo of the Water Mirror here in Bordeaux during blue hour and got my tripod (I use the Manfrotto Be Free) low to the ground to also capture the lines of the pool and rising mist.
Kristin also dives in to long exposure shots. These shots require a tripod and can really take your photos from amateur to professional level. This photography technique helps show movement and you can take long exposures to show the movement of everything from waterfalls to the ferris wheel moving around as with the long exposure I took above.
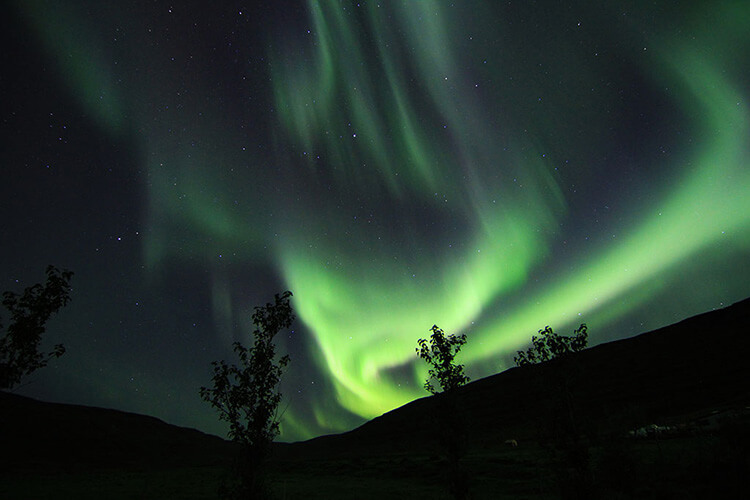
Tim and I are both also fascinated with the night sky. We’ve gone on a trip every season since 2011 to attempt to capture the Northern Lights. Capturing the Milky Way core is also on our list of photos we’d like to take, but as Kristin discusses in the astrophotography lesson, it takes a lot of planning. She has excellent suggestions for apps to download to help you plan out where and what time is best to capture the Milky Way.
Module 3: Selfies and Styling
As I already mentioned, for me as a photographer that already understood things like aperture, shutter speed, ISO and shooting techniques before starting the course, I was most excited about the selfies and styling module. It’s an area of photography that we know we both need to work on. Tim’s talent is landscape and taking photos of people is an entirely different set of skills. I also feel super awkward setting up a tripod and taking photos of myself.
As Kristin says in the lessons, the first thing is just not caring what other people think. She makes an excellent point that the chance you’ll ever run in to the very people that watched you take your selfies again is incredibly minuscule. So I broke out my tripod and aimed to capture some photos of myself.
Obviously, a shot with me in it in the Acqua Alta Book Store is far more interesting that if I’d just taken a photo of this same spot without a human subject included in it. And since I feel awkward looking and smiling at the camera, I chose a side profile pose. I also used a book from the bookstore as a prop to hide my iPhone, which I was using as my remote shutter. I actually didn’t plan my outfit as many women are doing these days, and it blended in nicely with the colors of the books.
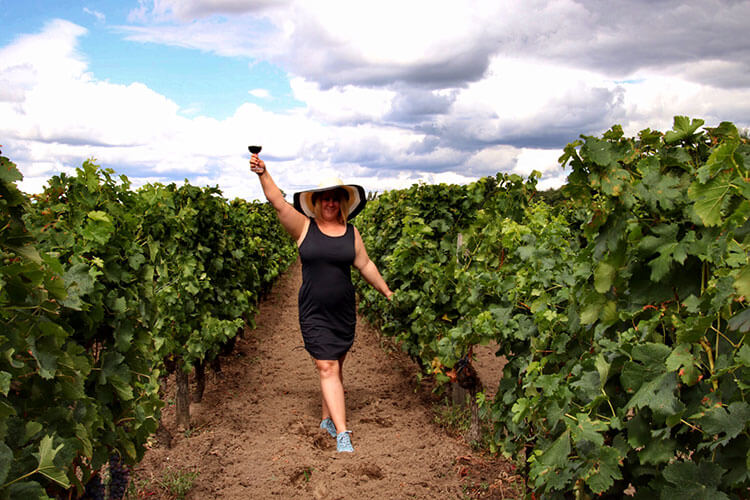
Kristin also talks about poses and angles that are more flattering. Elongating your body always helps to hide flaws and I used the pose in the Bordeaux vineyard to help stretch out my body every way possible. Though I felt absolutely ridiculous and it appears no one else is around at all, there was actually a small group of Japanese women that were watching me. They loved my pose so much, they asked to borrow my glass of wine and were doing the exact same thing as I took photos of each of them with their cameras and phones once I was done.
It’s also in this module that Kristin gets in to planning your photos. I’ll be honest. We do not just stumble in to 80% of our photo scenes. We do a lot of research up front and have lists of photos we’ll need to tell our story, research where to go by looking at street view and terrain view on Google Maps, and we even look at geolocation on Instagram for inspiration. For the above sunset shot on the rooftop of the Fondaco dei Tedeschi in Venice, Italy, I visited during the daytime to have a look at the rooftop and figure out exactly where I wanted to shoot from. It’s free to visit, but you only get 15 minutes on the rooftop and have to book your time slot in advance. To get the sunset shot I wanted once the lights actually turned on for all the buildings, I had to go in October since the the rooftop terrace closes and allows the last booking for 7:15pm. So I planned where exactly I wanted to set up my tripod on a planning visit, looked at the sunrise and sunset times and observed what time the lights switch on to illuminate the buildings. I was not just in the right place at the right time, but I did get lucky that the weather cooperated for the evening on which I planned my shoot.
Module 4: Editing
Editing is actually a huge part of stunning photos. Tim, for example, also has a slight tilt and we straighten out the horizon on many photos. If I’ve being honest, nothing drives me crazy more or shows that you’re an amateur as much as a crooked horizon. It’s one of the easiest things to fix in editing.
Tim has long been a fan of Lightroom and it is the editing software many photographers choose. I prefer Photoshop, really only because I learned how to use Photoshop a long time ago. This module was immensely helpful for me because reviewing the Photo Muse Masterclass forced me to actually sit down and finally learn how to edit in Lightroom.
Kristin takes you through all of the functions as she edits a photo, and you can visibly see what each function does with the changes to the photo she’s editing in the video. She also shows you how to set up Lightroom Presets, which you may have seen your favorite photographers and Instagrammers selling sets of recently. These are a quick edit function that allows you to give all your photos a common look and feel with the click of a button. If you’re editing sets of photos from similar lighting situations or similar settings, it really helps speed up the editing process.
Module 5: Branding
The last module is a few short lessons on blogging and Instagram. It only takes a couple of minutes and even if you’re not interested in improving your photography for a professional blog or Instagram account, there’s some good tips to help you grow your social media following. Of course, if you’re investing this much time in improving your photos, you probably actually want people to see and appreciate those photos. And Instagram is one of the best ways currently to do that.
Photo Muse Masterclass Cost
The Photo Muse Masterclass costs $297, and Kristin even allows you to break up the payments in to 3 payments.
I went through the entire course and Tim went through certain modules like astrophotography and editing. Even though we both already know photography basics, how to use our various Canon cameras and how to edit, we both still learned various things from the course. For a beginner photographer, you’ll learn a lot. The $297 price tag is well worth it to step up your photography game.
The next course enrollment opens again on November 23, 2018.
This article contains affiliate links. When you shop on Amazon or buy the Photo Muse Masterclass through our affiliate sites, we earn a small commission at no additional cost to you.


Linda says
Thanks for sharing your perspectives on the Photo Muse Masterclass. My hubby is a great photographer and I have learned a lot from him. He is happy to see how much my “eye” has improved. I agree that learning to use the camera and all of its features is a big step. An online course would be a great way to do that. I too have mixed views of being in photos for my blog or social media. A few tips on how to help make those pics look better might be good. Thanks for illustrating your points with your photos.
Mei says
It sounds like Kristin’s Photo Muse Masterclass’ is quite good for everyone who’d love to take better photos! I also agree that the golden and blue hours are the best time to shoot amazing pictures. And that it doesn’t necessary depend on which camera you use to take good photos, but it’s how you capture the landscapes or objet that matters.
Hannah says
Kristin’s class sounds great for a beginner wanting to make a go of photography as part of their blog etc. The number of people who have incredible cameras, but don’t know how to use them is such a shame – all that potential lost! I studied photography at university with a film camera, it shows my age but also taught me how to be more efficient with my photo-taking! Photo Muse Masterclass sounds like it helps to guide you to that point!
sherianne says
This sounds like a great class. I would love to learn more about Lightroom and different angles to get the people out of my photos. The price is fair, especially with presets as part of the deal. Thanks for the information!
Shruti Prabhu says
I’ve always wanted to learn how to take long exposure and night shots. Looks like a great class to up your game. A selfie with a tripod is also a skill that needs to be learnt especially while travelling solo. Love your Piazza San Marco photo! Angles can really make such a ton of difference.
Catherine Salvador Mendoza says
“Understanding your camera and photography basics will also help you capture your vacation photos faster”- this is so true, I’m not really a big fan of expensive cameras. In fact, I don’t have one. haha! Tho my partner has 3 different kinds and I’m lucky that I’m always the subject! However, in terms of modules like editing, selfies, branding, etc, they are really nice to know and learn. Capturing photos is one of the best things in travels. Would love to attend such a class or lessons like this photo muse master class!
Mansoureh says
I also improved my photography and videography skills with the help of online courses. I an like Kristin Addis and want to be on the photos. I think when you capture a photo with a human being in it, you can connect with your audiences better. Of course, if you are a landscape photographer the story is different. I also agree with you that you don’t need expensive cameras to capture nice photos. Everyone can start with affordable equipment and then later buy more complicated and expensive ones
Mansoureh Farahani says
I also improved my photography and videography skills with the help of online courses. I an like Kristin Addis and want to be on the photos. I think when you capture a photo with a human being in it, you can connect with your audiences better. Of course, if you are a landscape photographer the story is different. I also agree with you that you don’t need expensive cameras to capture nice photos. Everyone can start with affordable equipment and then later buy more complicated and expensive ones
Jenn and Ed Coleman says
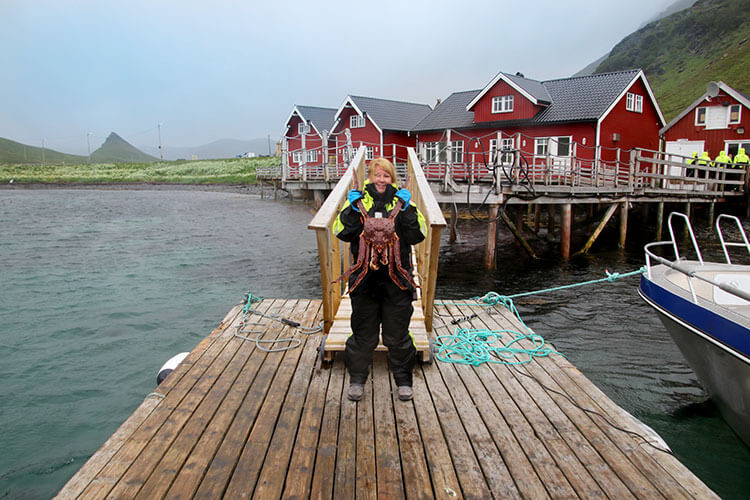
That sounds like a very thorough class. I always loved your picture of you and the king crab. It was interesting to hear how you saved it in the editing room. Learning the basics of photography will take you so much farther than equipment. You have to know the basics before all the fancy stuff even matters.
Claire says
I do love taking photos but haven’t invested in a camera – I am amazed by the quality of phone pictures these days but I would love to up my game and learn properly how to use a camera. Sounds like a great course to show me that!
Ami Bhat says
Every now and then, a refreshing course like this does wonders to your memories. I see that there is a lot being covered in this online module. Definitely something I would want to consider – after all, there is always scope for improvement. Thanks a bunch for sharing this with us.